
Watching the night sky on a clear evening allows you to see countless stars and distant planets, but a telescope brings these wonders close enough to see the rings of Saturn or the Moon's craters in great detail. This guide explains the basic science behind telescopes and the different types available today using simple language without any confusing technical jargon.
At dubaitelescope.com, we have been a trusted resource for enthusiasts in Iran for over 25 years and have operated in Dubai as Magic Shop for the past 15 years. Our mission is to help everyone, from beginners to serious astronomers, understand these exciting tools and make the beauty of the night sky accessible to all.
What Is a Telescope?
A telescope is a tool that collects light from distant objects and brings that light into focus so you can see a clear, magnified image. The keyword here is light. Everything a telescope does comes down to gathering and focusing light, whether from a star millions of miles away or a planet in our own solar system.
If you are interested in exploring the night sky yourself, you can find various Telescopes designed for different levels of experience.
The human eye is small. It can only collect a tiny amount of light at once. A telescope has a much larger opening, called the aperture, that captures far more light than your eye ever could. More light means a brighter, sharper, more detailed image. That is the foundation of how telescopes work.
The Main Parts of a Telescope
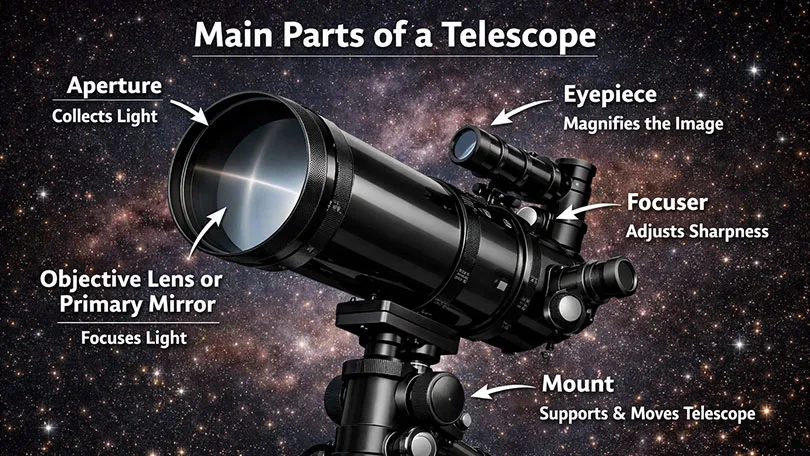
Before we get into how it all works, it helps to know the basic parts:
- Aperture: the opening that collects light. Bigger aperture = more light = better image.
- Objective lens or primary mirror: the main optical element that bends or reflects light to a focus point.
- Eyepiece: a small lens you look through that magnifies the focused image.
- Focuser: lets you adjust sharpness by moving the eyepiece closer or further from the lens or mirror.
- Mount: the support structure that holds the telescope steady and allows smooth movement.
How Do Telescopes Work: Step by Step
Telescopes may look complicated at first, but the basic idea behind them is actually very simple. A telescope works by collecting light from distant objects, focusing that light, and then magnifying the image so your eyes can see details that would normally be impossible to notice. Every telescope, whether small or large, follows the same basic process.
Here is how it works step by step:
Step 1: Light Enters the Telescope
Everything you see in the night sky gives off or reflects light. Stars produce their own light, while planets reflect sunlight. That light travels through space for huge distances before finally reaching Earth.
When you point a telescope toward the sky, the first thing it does is collect that light through the front opening of the telescope, called the aperture. The aperture is one of the most important parts of any telescope because it determines how much light the telescope can gather.
A larger aperture allows more light to enter. This is why bigger telescopes can show dim galaxies, faint nebulae, and distant planets much more clearly than smaller ones. More light also means brighter and sharper images. In astronomy, light-gathering power is often more important than magnification because, without enough light, objects will appear dark and blurry.
You can think of the telescope like a giant bucket collecting light from space. The larger the bucket, the more light it can capture.
Step 2: Light Gets Bent or Reflected
After the light enters the telescope, it needs to be directed and focused. This happens using either lenses or mirrors, depending on the type of telescope. In a refracting telescope, the light passes through a curved glass lens at the front. The lens bends the incoming light rays inward. This process is called refraction. The bending helps bring the light together into focus.
In a reflecting telescope, the telescope uses a curved mirror instead of a lens. The mirror reflects the light toward another mirror and then into the eyepiece. This process is called reflection.
Even though refractors and reflectors work differently inside, their goal is the same: to gather the incoming light and focus it into a clear image.
The curved shape of the lens or mirror is extremely important because it helps all the light rays meet at one specific location called the focal point.
Step 3: An Image Forms at the Focal Point
As the light rays come together inside the telescope, they form a small image at the focal point. This is where the telescope creates the actual picture of the object you are viewing. At this stage, the image is usually upside down or reversed. This is completely normal and does not affect astronomical observing. In space observation, image orientation is not very important because there is no “up” or “down” in space.
What matters most is that the telescope has successfully gathered faint light from far away and focused it into a sharp image. Without this focusing process, stars and planets would remain tiny, blurry points.
The distance between the main lens or mirror and the focal point is called the focal length. Telescopes with longer focal lengths usually provide higher magnification and narrower views, while shorter focal lengths provide wider views of the sky.
Step 4: The Eyepiece Magnifies the Image
The image formed inside the telescope is still very small, so the next step is magnification. This is the job of the eyepiece. The eyepiece is the small lens you look through. It works like a magnifying glass by enlarging the focused image created by the telescope.
Different eyepieces provide different levels of magnification. A short focal length eyepiece gives higher magnification, making planets appear larger. A longer focal length eyepiece gives lower magnification but shows a wider area of the sky, which is useful for viewing star clusters or large nebulae.
Many beginners think higher magnification always means a better telescope, but that is not true. Extremely high magnification can actually make images blurry and shaky if the telescope cannot gather enough light or if the atmosphere is unstable.
A balanced combination of good optics, enough light-gathering power, and reasonable magnification produces the best viewing experience.
Step 5: You See the Final Image
Finally, when you place your eye at the eyepiece, you see the magnified image of the object. The telescope has now completed its job. Light from a distant object has traveled across space, entered the telescope, been collected, focused, and enlarged so your eye can observe details that would otherwise remain invisible.
This is how telescopes allow people to see the rings of Saturn, the moons of Jupiter, craters on the Moon, distant galaxies, and countless stars far beyond normal human vision.
In simple terms, the answer to how telescopes work is this: they collect more light than the human eye, focus that light into an image, and magnify it so we can explore the universe in far greater detail.

The Two Main Types of Telescopes
Understanding the types of telescopes is important for understanding how they work, because each type uses a different method to collect and focus light. If you are looking to buy your first instrument, exploring the various Types of Telescopes available will help you decide which optical design best suits your stargazing goals.
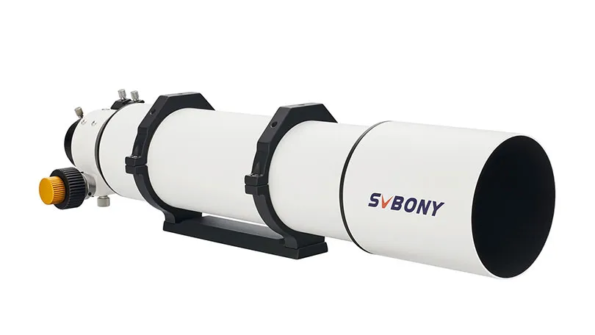
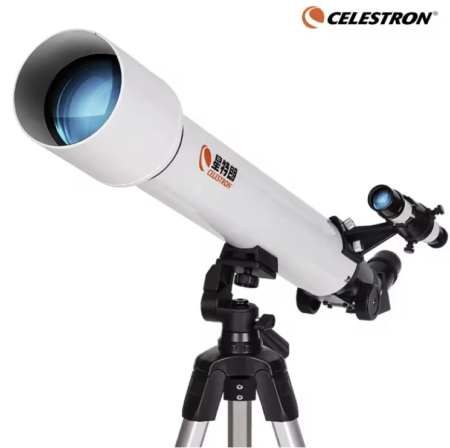
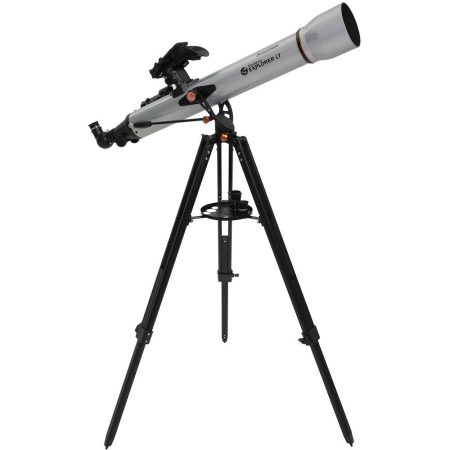
Refractor Telescopes (Lens-Based)
Refractor telescopes use a large objective lens at the front to gather and bend light. The light travels down a long tube and comes to focus near the back, where the eyepiece sits. Refractors are great for looking at the Moon and planets. They give sharp, high-contrast images and require very little maintenance. The downside is that large refractors can get expensive because making large, high-quality glass lenses is not easy.
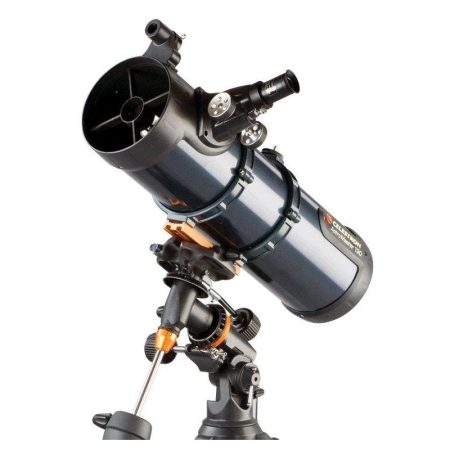
Reflector Telescopes (Mirror-Based)
Reflector telescopes use a curved mirror instead of a lens. Light enters the open top of the tube, travels down, hits the primary mirror at the bottom, and reflects up to a secondary mirror that directs it to the eyepiece on the side of the tube.
Reflectors are more affordable for their size and are excellent for deep-sky viewing, galaxies, nebulae, and star clusters. They do need occasional mirror alignment, which is called collimation. If you are still deciding between different designs and wondering, "What's a Refractor Telescope?" you might find that while reflectors use mirrors, refractors rely on lenses to capture light.
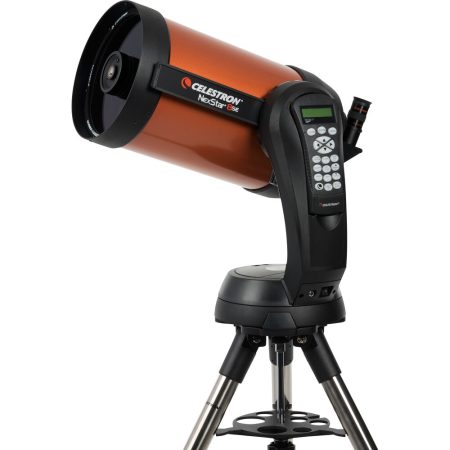
Compound Telescopes (Mirror and Lens Combined)
Compound telescopes, also known as catadioptric telescopes, use both lenses and mirrors. This design keeps them compact while still providing a long, effective focal length. They are versatile, portable, and popular with both beginners and experienced observers.
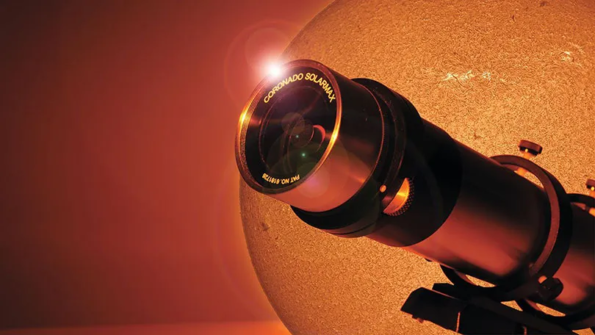
Common types include the Schmidt-Cassegrain and Maksutov-Cassegrain. While these models are great for nighttime viewing, those interested in observing our closest star can also find specialized Solar Telescopes designed specifically for safe daytime use.
Why Aperture Size Matters
If someone asks what single feature matters most in a telescope, the answer is aperture. The aperture is the diameter of the main lens or mirror. A larger aperture collects more light, which means you can see fainter objects and resolve finer details.
A 70mm aperture is good for beginners; it will show you the Moon, Saturn's rings, Jupiter's moons, and some star clusters. A 130mm aperture opens up much more, including distant galaxies and nebulae. Professional-grade telescopes can have apertures of 200mm, 300mm, or far more.
Magnification matters too, but it is often misunderstood. Many beginners think higher magnification is always better, but without enough aperture to back it up, high magnification just gives you a blurry, dim image. Always prioritize aperture first.
Understanding Focal Length and Magnification
Focal length is the distance between the lens or mirror and the point where light comes into focus. It is measured in millimetres (mm) and is usually printed on the telescope body.
To calculate magnification, divide the focal length of the telescope by the focal length of the eyepiece. For example, a telescope with a 900mm focal length and a 25mm eyepiece gives you 36x magnification. Swap in a 9mm eyepiece, and you get 100x magnification.
There is also a concept called the focal ratio (or f/number), which is the focal length divided by the aperture. A low f/number (like f/5) means a fast, wide-field telescope, good for large objects like star fields or nebulae. A high f/number (like f/12) means a narrower view with more detail, better for planets and the Moon.
Mounts: Keeping Your View Steady
A great optical system means nothing if the telescope is shaking. The mount is what keeps the telescope stable and allows smooth movement as you track objects across the sky.
There are two main types of mounts. An alt-azimuth mount moves up-down and left-right, simple and easy to use, great for beginners and casual viewing. An equatorial mount is aligned with Earth's rotation, which makes it easier to track stars as they move across the sky. This type is preferred for astrophotography or serious observation sessions.
Many modern telescopes also come with motorized or computerized mounts (called GoTo mounts) that can automatically locate and track thousands of objects in the sky. These are a major help for beginners who are still learning their way around the night sky.
What Happened to Orion and Meade? And What Comes Next
Orion and Meade were two of the most trusted names in amateur astronomy for decades. Both brands are now discontinued, and their telescopes are no longer in production.
That gap in the market is real, but it does not have to stop you. With 25 years of experience in Iran (dubaitelescope.com) and 15 years in Dubai (Magic Shop), we know exactly what made those brands great. We carry high-quality alternatives that match the same performance standards, whether you are just starting or looking for a serious setup.
Great telescopes still exist. We will help you find the right one.
Tips for Getting the Most Out of Your Telescope
- Let your eyes adjust to the dark for at least 20 minutes before observing. Your night vision improves dramatically in that time.
- Start with a low-magnification eyepiece to find your target, then switch to a higher magnification to see detail.
- Let your telescope cool down outside for 30 minutes before use. Temperature changes affect the optics and image sharpness.
- Observe from the darkest location you can reach. City lights wash out faint objects.
- Use a star map app or a printed chart to know what is visible on any given night.
What Can You See With a Telescope?
Once you understand how telescopes work, the next question is naturally: what can I actually see? The answer depends on your aperture, your location, and the sky conditions, but even a modest telescope opens up a world of wonder.
- The Moon: craters, mountain ranges, and the lunar surface in stunning detail.
- Planets: Saturn's rings, Jupiter and its four largest moons, Mars's polar ice caps, and Venus's phases.
- Star clusters: hundreds of stars packed together, visible as beautiful groups.
- Nebulae: glowing clouds of gas and dust where new stars are being born.
- Galaxies: distant island universes millions of light-years away, visible as soft glowing patches. If you want to see these incredible sights for yourself, you’ll need a high-quality instrument. You can find detailed recommendations in our guide on The Best Telescopes for Viewing Planets and Galaxies, which explains which models offer the clarity needed to observe deep-space objects.

Conclusion
Now you know how telescopes work, from the light that enters the aperture, to the lens or mirror that focuses it, to the eyepiece that brings it to your eye. It is a simple idea at its heart: collect more light, bring it to a point, and magnify it. But the result is anything but simple. A telescope connects you to the universe in a way that nothing else can.
Whether you are buying your first telescope or upgrading to something more serious, the most important thing is to get out there and look up. The Moon is always waiting. Saturn never gets old. And once you spot your first galaxy with your own eyes, you will never see the night sky the same way again.
We know telescopes inside and out, and we are always here to help you find the one that is right for you.
FAQ
The most important feature is the aperture (the diameter of the main lens or mirror). A larger aperture collects more light, allowing you to see fainter objects and much sharper details than a high magnification power alone would.
It comes down to the optics: Refractors use glass lenses to bend light and are great for crisp views of the Moon and planets. Reflectors use curved mirrors to bounce light and are generally more affordable for viewing deep-sky objects like galaxies.
This is perfectly normal! Most astronomical telescopes flip the image as a result of how the light is focused. In space, there is no "up" or "down," so it doesn't affect your viewing experience of stars and planets.


No Comments