
wEmbarking on Your Cosmic Photography Adventure: Why the Right Telescope is Crucial
َAh, the sweet search for the best telescope for astrophotography! What a delight! There's a unique thrill in capturing the faint, ethereal light of distant galaxies or the intricate details of a nebula, wonders often just beyond the reach of our naked eyes. This is the allure of astrophotography, a pursuit that blends art, science, and a healthy dose of patience.
However, many aspiring cosmic photographers quickly realize a common misconception: that any telescope will suffice to take stunning night sky pictures. The truth is visual observation has very different demands compared to the stringent requirements of astrophotography. Long exposures needed to capture faint objects demand exceptional tracking accuracy and optical precision that many entry-level visual telescopes simply don't possess.
From the very beginning, selecting a suitable telescope for astrophotography is crucial. It will save you from common frustrations, prevent costly missteps, and ultimately set you on the path to achieving those rewarding, breathtaking images. Think of it this way: astrophotography telescopes are specialized instruments for a deeply rewarding, specialized hobby, and choosing wisely is your first giant leap.
Decoding the Specs: Key Factors for the Best Telescope for Astrophotography
Now that you understand why the right equipment is so important for imaging the cosmos let's dive into the what. Choosing the best telescope for astrophotography involves understanding a few key specifications that directly impact the quality and type of images you can capture. These aren't just numbers on a spec sheet; they are the defining characteristics that will shape your journey.
Aperture: More Than Just Size, It's About Light!
Aperture refers to the diameter of the telescope's main light-gathering element, either a lens (in refractors) or a mirror (in reflectors), or the combination of a mirror and a lens neighbored inside a tube. Its primary role in astrophotography is to collect as many photons as possible from faint, distant objects. Think of it as the pupil of your cosmic eye – the wider it opens, the more light it lets in.
For dim nebulae and galaxies, more light directly translates to more data for your images, resulting in brighter, more detailed pictures with less noise. While the mantra "bigger is better" often holds true for light-gathering power, a larger aperture also means a physically bigger, heavier, and often more expensive telescope. This impacts portability, the robustness of the mount required to support it, and, of course, your budget. Not to mention the distortions in your tracking movement due to a heavier optic pushing mounts to their limits.
So, when considering a telescope for astrophotography, balance the desire for aperture with these practical realities.
Focal Length & Focal Ratio (f-number): Framing Your Celestial Canvas
Focal length is the distance (usually measured in millimeters) from the telescope's primary optic (lens or mirror) to the point where the light comes into focus – the focal plane, where your camera sensor will be. This characteristic directly determines the telescope's magnification and its field of view (FOV). A longer focal length results in higher magnification and a narrower FOV, which is excellent for zeroing in on smaller targets like planets, distant galaxies, or planetary nebulae. Conversely, a shorter focal length provides lower magnification and a wider FOV, ideal for capturing expansive targets like large nebulae, sprawling star clusters, or broad swathes of the Milky Way.
Closely related is the focal ratio, or f-number (e.g., f/5, f/8). This is calculated by dividing the telescope's focal length by its aperture. The focal ratio essentially tells you the "speed" of the telescope for astrophotography. A lower f-number (e.g., f/4, f/5) is considered "faster" because it collects more light in a given exposure time, which is highly advantageous for imaging faint deep-sky objects as it allows for shorter individual exposures. Higher f-numbers (e.g., f/10, f/12) are "slower." Different astrophotography telescopes are designed with varying focal lengths and ratios to cater to specific imaging needs, so understanding this interplay is key.
Optical Design: Choosing Your Astrophotography Telescope's Heart
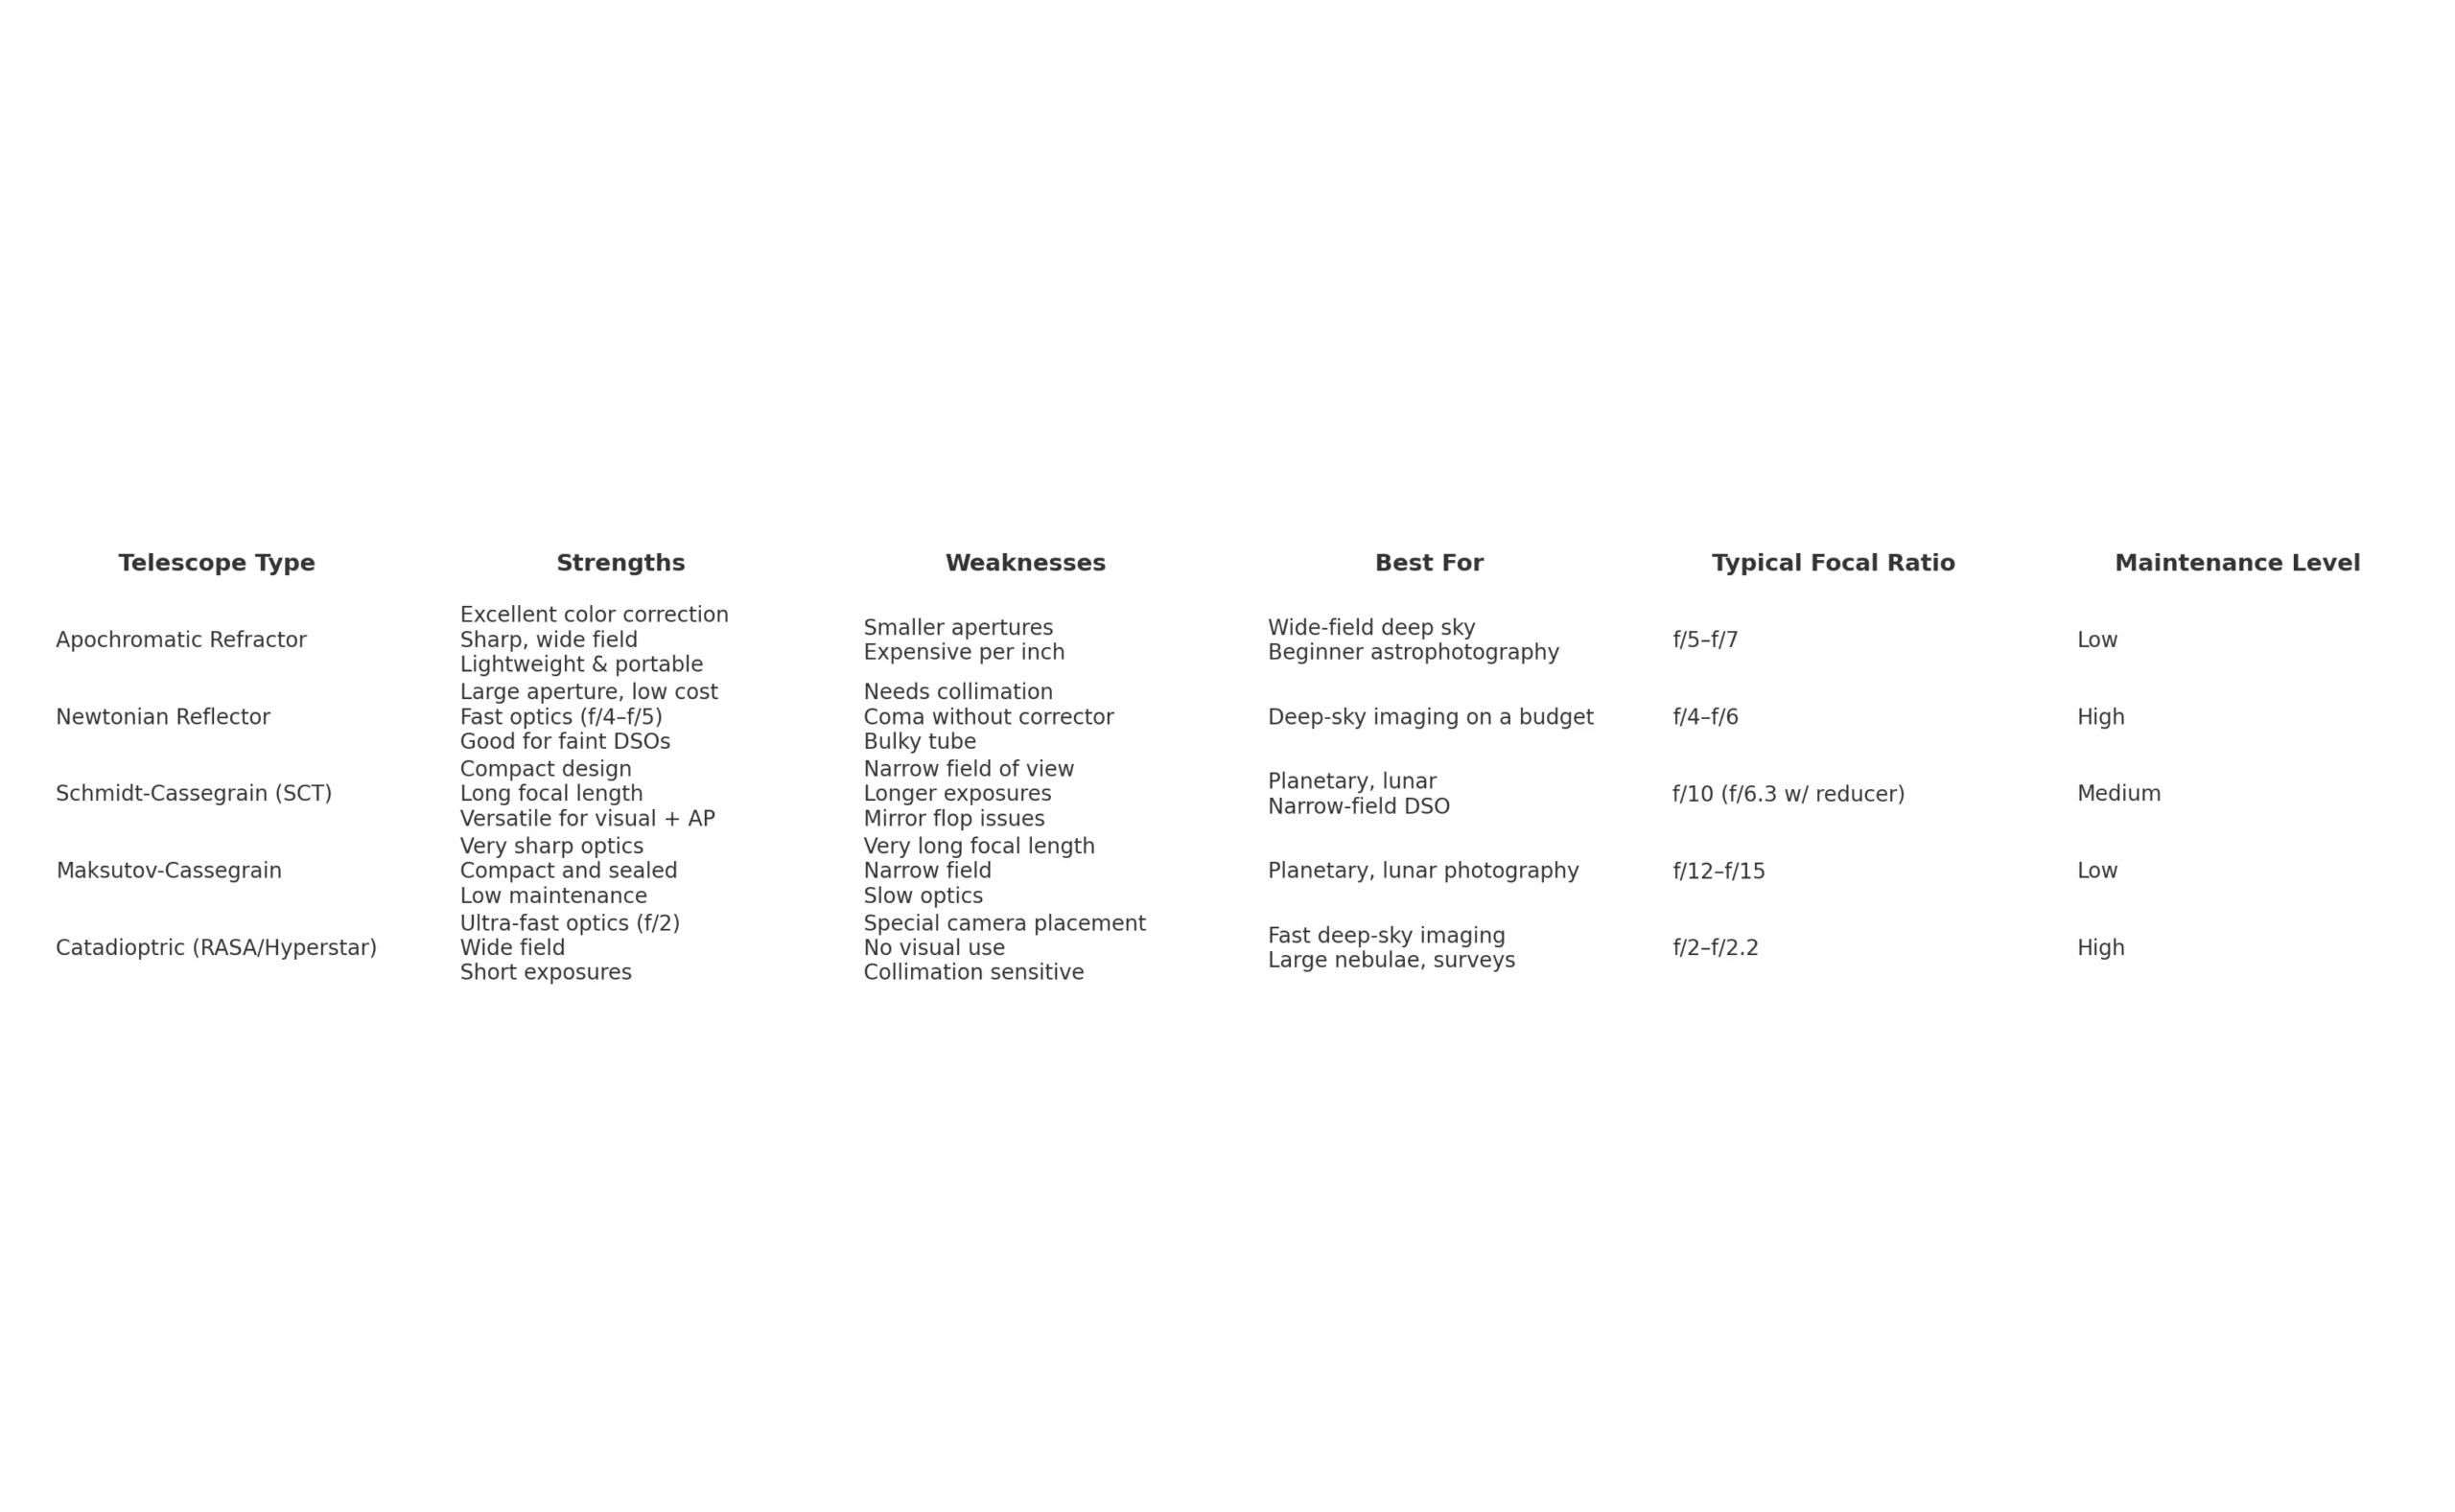
The optical design is the fundamental architecture of your telescope, dictating how it gathers and focuses light. Several designs are popular for astrophotography, each with its own set of advantages and disadvantages.
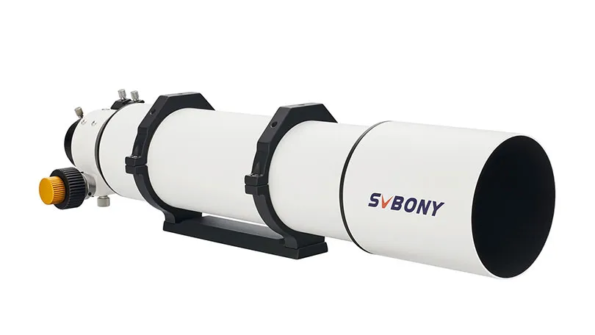
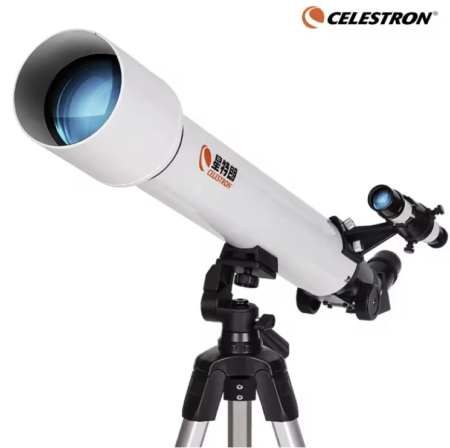
Apochromatic (APO) Refractors: The Premium Choice for Many
Apochromatic refractors use a series of specialized lens elements made from extra-low dispersion (ED) glass or fluorite to bring all wavelengths of light (red, green, and blue) to the same sharp focus.
- Pros: They deliver exceptionally high contrast, pinpoint sharp stars across the field, and virtually no chromatic aberration (false color fringing around bright objects). APOs typically have no central obstruction (like secondary mirrors in reflectors), leading to cleaner diffraction patterns and slightly better contrast. They are also robust and often require little to no maintenance like collimation. For many, an APO is a strong candidate for the best telescope for astrophotography, especially for wide-field deep-sky objects and for those prioritizing ease of use and pristine image quality.
- Cons: Their primary drawback is cost; compared to other designs, APOs represent the highest price per inch of aperture.
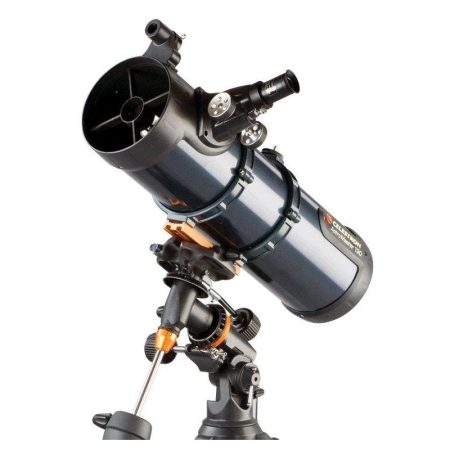
Newtonian Reflectors: Power and Affordability for Imaging
Newtonian reflectors use a primary concave mirror to gather light and a smaller, flat secondary mirror to direct it to the focuser on the side of the tube.
- Pros: Newtonians offer the most aperture for your money, making them excellent light buckets for capturing faint deep-sky objects. Faster focal ratios (e.g., f/4, f/5) are common and highly desirable for astrophotography. They can provide outstanding results, particularly for their cost.
- Cons: They inherently suffer from an optical aberration called coma, where stars towards the edge of the field of view appear elongated, like tiny comets. This necessitates the use of a coma corrector for serious imaging. Newtonians are also generally larger and bulkier than refractors of similar focal length and require regular collimation (alignment of the mirrors) to perform optimally. Despite these points, a well-maintained Newtonian can be an exceptional value telescope for astrophotography.
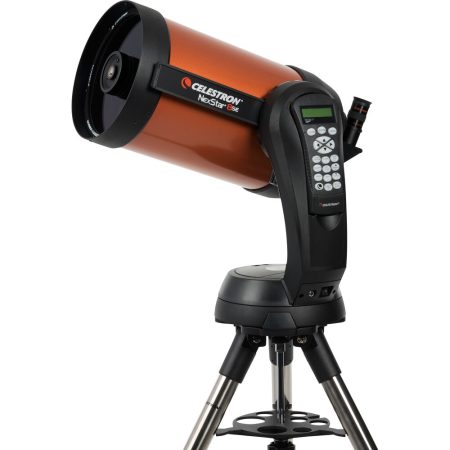
Catadioptric Telescopes (SCTs & Maks): The Versatile All-Rounders
Catadioptric telescopes, primarily Schmidt-Cassegrains (SCTs) and Maksutov-Cassegrains (Maks), use a combination of mirrors and lenses to fold the light path, resulting in a compact tube design.
- Pros: Their folded optics mean they are remarkably compact and portable for their typically long focal lengths. This long reach makes them very good for planetary imaging, lunar details, and capturing smaller deep-sky objects like distant galaxies or planetary nebulae.
- Cons: SCTs and Maks are usually "slower" systems, often around f/10. While this is fine for planets, for fainter deep-sky objects, a focal reducer is often employed to shorten the effective focal length and speed up the system (e.g., to f/6.3 or f/7). They can also suffer from field curvature (stars not being in focus across the entire flat sensor plane), often requiring a field flattener or the aforementioned reducer/flattener. Some SCTs can experience "mirror flop" (slight movement of the primary mirror during long exposures), though modern designs have largely mitigated this. These can be very capable astrophotography telescopes when paired with the right accessories and understanding.
The Mount: The Unwavering Foundation of Your Astrophotography Telescope
Often overlooked by beginners but arguably the most critical component of any astrophotography setup, the mount is the unsung hero. For long-exposure astrophotography, a rock-solid German Equatorial Mount (GEM or EQ mount) is virtually non-negotiable. Unlike Alt-Azimuth mounts that move in simple up-down and left-right motions (fine for visual), an EQ mount has one axis aligned with the Earth's axis of rotation. This allows it to track celestial objects smoothly across the sky with the motion of a single motor, counteracting the Earth's spin. This precise tracking is paramount for achieving sharp, pinpoint stars in your images. Pay close attention to the mount's payload capacity – it must comfortably handle the total weight of your telescope for astrophotography, camera, guide scope, and any other accessories. Overloading a mount is a surefire recipe for blurry images and immense frustration. Stability and accurate tracking are the bedrock of good astrophotography.
Tailoring Your Choice: The Best Telescope for Astrophotography for Specific Targets
It’s important to understand that the "absolute best" telescope is a subjective concept; it heavily depends on what celestial objects you are most passionate about photographing. Different types of telescopes excel at different tasks.
Capturing Nebulae and Galaxies (Deep-Sky Objects - DSOs)
These are the crown jewels for many astrophotographers: the vast emission nebulae like the Orion Nebula or the Lagoon Nebula, the subtle glow of reflection nebulae like the Pleiades, or the majestic spirals of galaxies like Andromeda.
- Ideal characteristics for a telescope for astrophotography targeting DSOs include a relatively fast focal ratio (typically f/4 to f/7) to minimize exposure times on these faint targets, good light-gathering ability (aperture is your friend here), and a well-corrected, flat field of view to ensure stars are sharp from edge to edge.
- Recommended types: Apochromatic (APO) refractors shine here, especially for their excellent color correction, contrast, and often wider fields of view, making them a top choice for many. Fast Newtonian reflectors, when paired with a good coma corrector, offer incredible value and light grasp. These features truly contribute to making them the best telescope for astrophotography for these breathtaking targets.
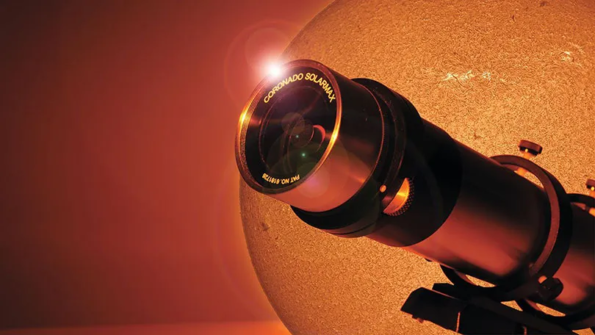
Imaging the Moon and Planets: Our Solar System Neighbors
Capturing the stunning details of Jupiter's cloud bands, Saturn's intricate rings, Mars's polar ice caps, or our Moon's rugged craters and mountains requires a different approach.
- Ideal characteristics for a telescope for astrophotography aimed at planetary or lunar imaging involve a longer focal length to achieve higher magnification and resolve fine details. Excellent optical quality is paramount. While precise tracking is still crucial, the imaging technique often involves "lucky imaging"—capturing many short video frames and stacking the sharpest ones—rather than single very long exposures.
- Recommended types: Schmidt-Cassegrains (SCTs) and Maksutov-Cassegrains (Maks) are very popular choices due to their long focal lengths in a compact package. Longer focal length APO refractors can also perform exceptionally well, though they can be pricier for the necessary aperture. These astrophotography telescopes provide the reach needed to bring out the subtle features of our celestial neighbors.
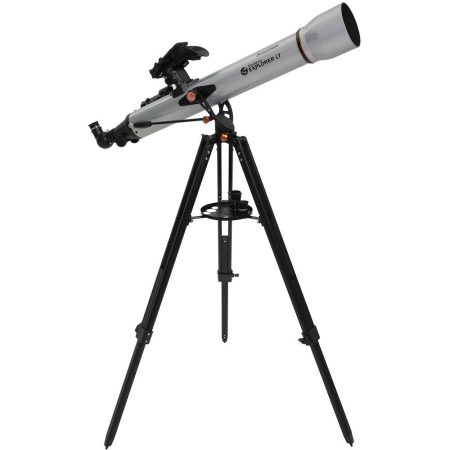
Sweeping Vistas: Wide-Field Astrophotography (Milky Way, Constellations)
Sometimes, the goal is to capture the grand tapestry of the night sky itself – expansive shots of the Milky Way arching overhead, entire constellations, or even multiple DSOs nestled within a single wide frame (like the Orion's Belt and Sword region).
- Ideal characteristics: This type of imaging calls for a short focal length (e.g., from 135mm up to around 400mm for dedicated astrophotography telescopes or even standard camera lenses on a tracker), a very flat field to ensure sharp stars across the wide expanse, and fast optics (low f-number) to capture as much light as possible.
- Recommended types: Small, high-quality APO refractors, sometimes specifically marketed as "astrographs" in this focal length range, are superb. For even wider fields, a good quality telephoto or prime camera lens mounted on a dedicated star tracker (a small, portable EQ mount for cameras) can produce spectacular results.
Your First Steps: Assembling Your Astrophotography Telescope Setup
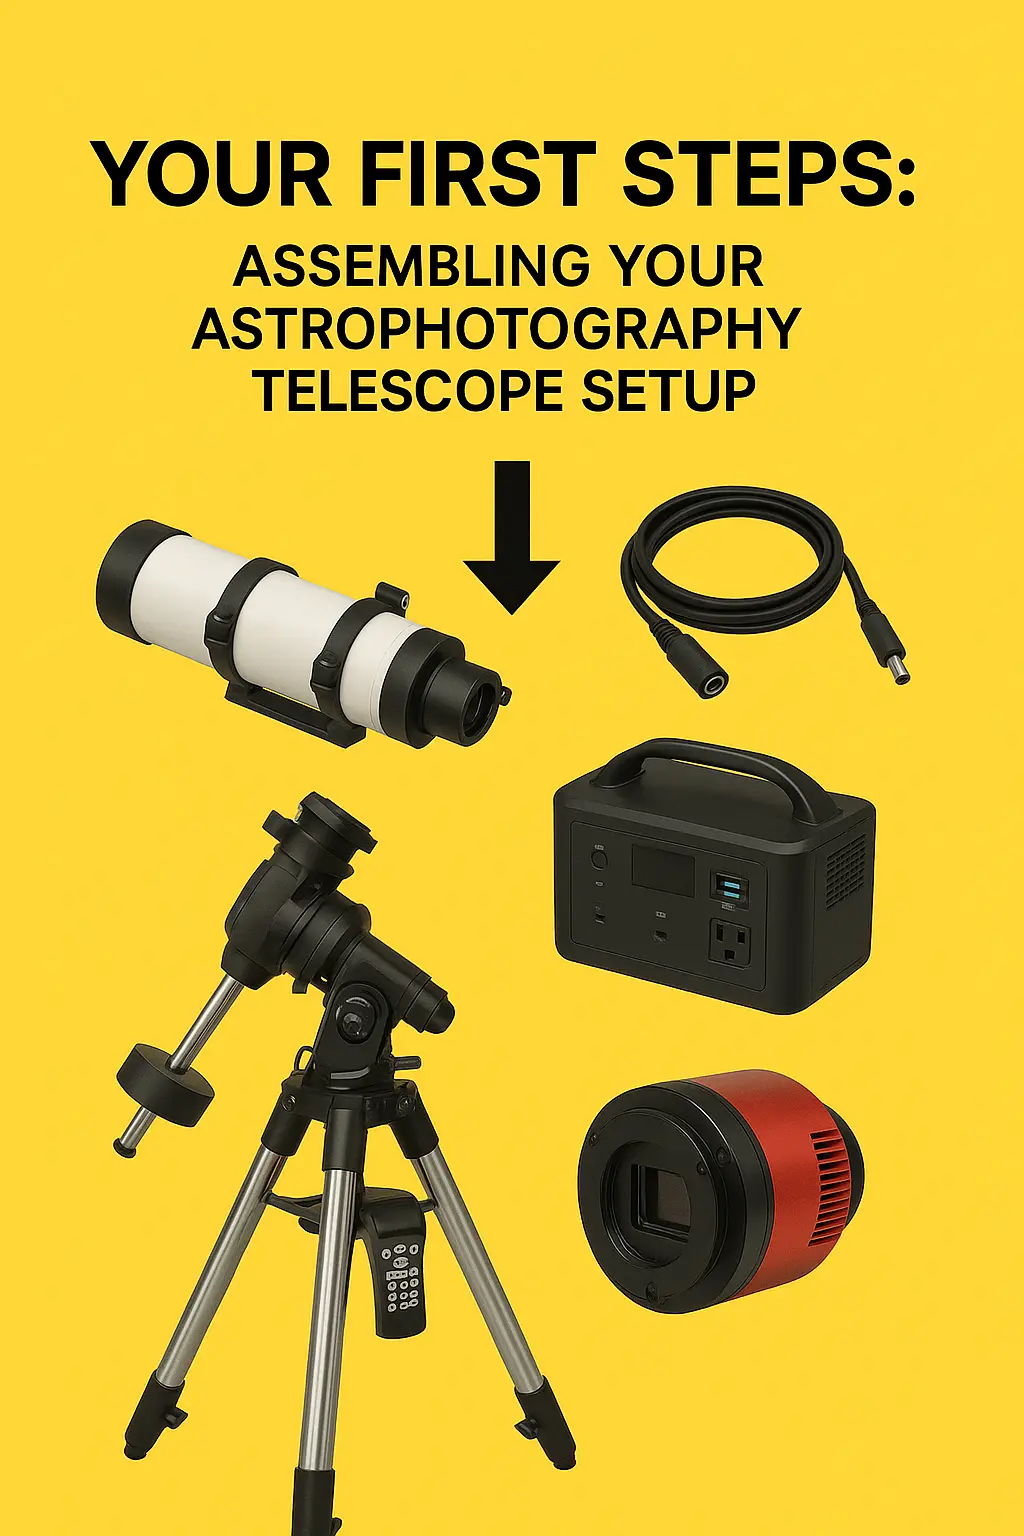
Embarking on astrophotography is an incredibly rewarding journey, but it comes with a learning curve. Assembling your first setup might seem daunting, but the satisfaction of capturing your first celestial image makes it all worthwhile.
Starting Smart: Sensible Choices for Beginner Astrophotographers
The golden rule for anyone starting in astrophotography is this: do not skimp on the mount! A high-quality, stable equatorial mount is far more important than the telescope itself in the early stages. A modest telescope for astrophotography on an excellent mount will consistently outperform an amazing telescope on a shaky, inadequate mount.
For a first telescope for astrophotography, consider smaller, high-quality APO refractors (in the 60mm to 80mm aperture range) or a well-mounted, manageable Newtonian reflector (perhaps a 6-inch f/4 or f/5). These instruments are generally more forgiving, easier to learn, and can produce stunning images.
It's also vital to manage expectations. Your first images likely won't rival those from the Hubble Space Telescope. Astrophotography is a journey of continuous learning and refinement. Many beginner-friendly astrophotography telescopes offer a fantastic starting point for this adventure, setting you up for success rather than frustration. This approach ensures you invest in a setup that grows with you rather than one you quickly outgrow or become disheartened by, making it the best telescope for astrophotography for you at this stage.
Essential Companions: Key Accessories for Your Telescope for Astrophotography
Beyond the telescope and mount, several key accessories are essential for transforming your setup into a capable imaging rig. These aren't just bells and whistles; they are crucial components for achieving the best results with your chosen telescope for astrophotography.
Camera Adapters (T-Rings & T-Adapters)
These are the physical links between your camera (whether a DSLR, mirrorless or a dedicated cooled astronomy camera) and the telescope's focuser. A T-Ring is specific to your camera's lens mount (e.g., Canon EF, Nikon F, Sony E), and it screws onto a T-Adapter, which then inserts into or threads onto the telescope's focuser.
Field Flatteners / Coma Correctors
No telescope provides a perfectly flat focal plane across a large sensor without some help. Refractors, especially faster ones, benefit immensely from a field flattener, which corrects the field curvature, ensuring stars are pinpoint sharp from the center to the corners of your image. Newtonian reflectors, as mentioned earlier, require a coma corrector to eliminate the comet-like appearance of stars at the edges of the field. These are often considered indispensable for serious imaging.
Autoguiding System (Off-Axis Guider or Guide Scope & Camera)
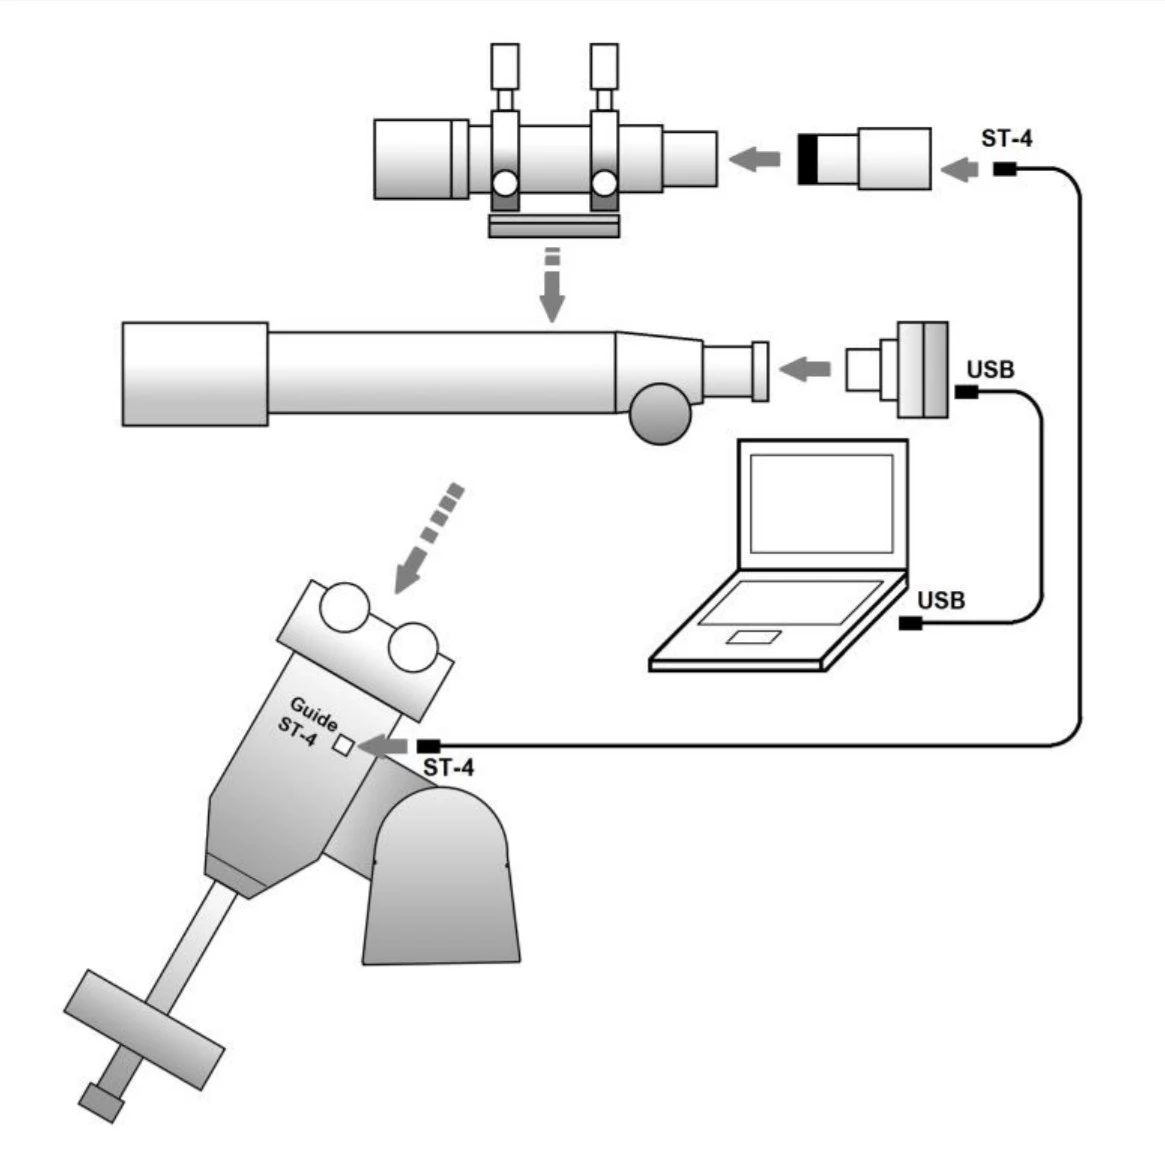
Even the best mounts have tiny imperfections in their tracking gears (periodic error). For exposures longer than a minute or two, an autoguiding system is essential to achieve perfectly round, pinpoint stars. This typically consists of a small, secondary guide scope and guide camera mounted parallel to the main telescope or an off-axis guider (OAG) that picks off a small portion of light from the main telescope's field of view. This system locks onto a guide star and sends minute corrections to the mount to keep it perfectly on target.
Filters (Light Pollution, Narrowband)
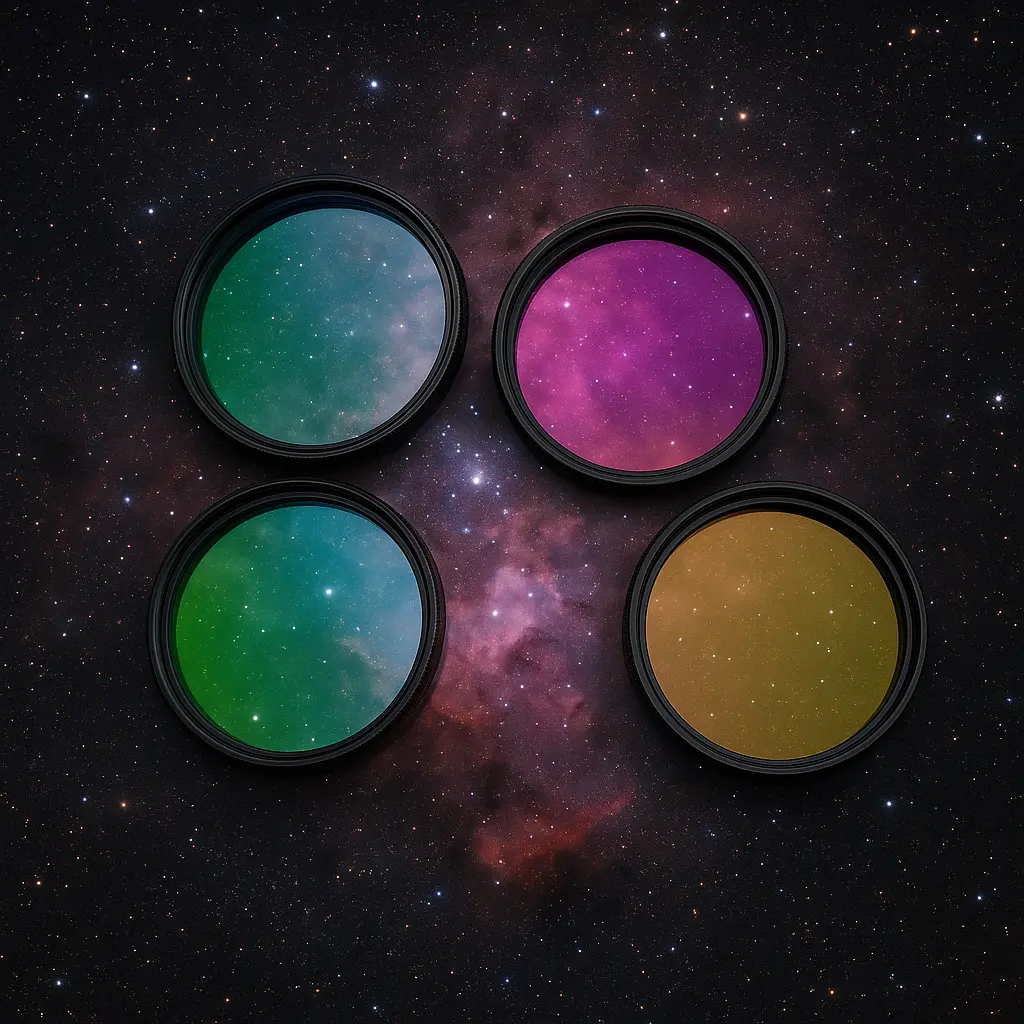
If you live in or near urban or suburban areas, light pollution can wash out faint details in your images. Light pollution suppression (LPS) filters can help by blocking specific wavelengths of light associated with common streetlights. For even more advanced imaging, especially of emission nebulae, narrowband filters (Hydrogen-alpha, Oxygen-III, Sulphur-II) are game-changers. They isolate very specific wavelengths emitted by these objects, allowing you to capture stunning detail even from heavily light-polluted skies and create vibrant "Hubble palette" color images.
Reliable Power Solution
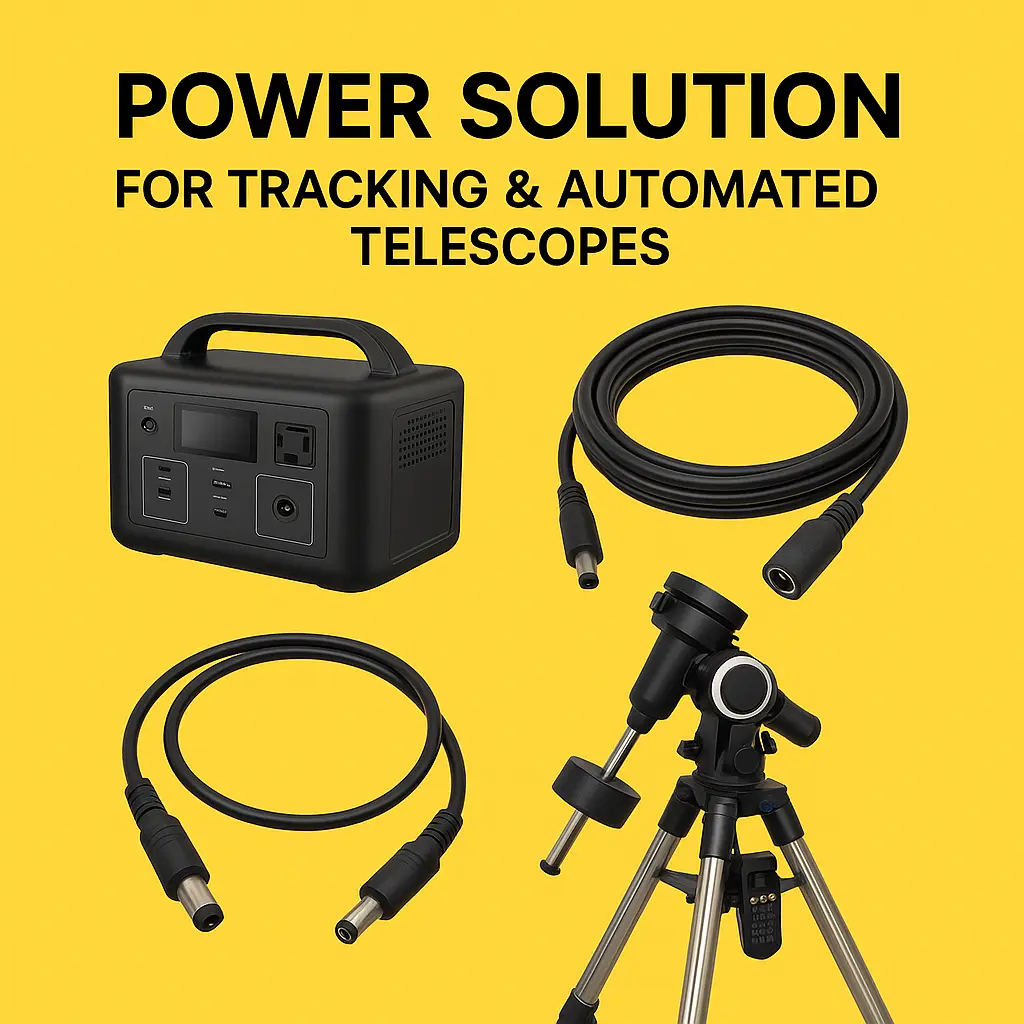
Astrophotography sessions can last all night. You'll need a reliable portable power source, like a deep-cycle marine battery or a dedicated astronomy power tank, to run your mount, camera (especially if it's cooled), laptop (if used for control), dew heaters (to prevent condensation on optics), and any other electronic accessories.
Why Dubaitelescope is Your Partner in the Cosmos
At Dubaitelescope, our philosophy extends beyond simply selling equipment. As passionate astronomers ourselves, we are deeply committed to helping you succeed and find joy in your astrophotography endeavors. We understand that navigating the myriad of options can be overwhelming, which is why we offer expert, unbiased advice tailored to your specific goals, budget, and experience level. To find the best telescope for astrophotography, you can rely on us and contact us.w
Our curated selection features a comprehensive range of astrophotography telescopes, robust mounts, specialized cameras, and essential accessories from the world's most trusted brands. Furthermore, our commitment to you doesn't end with a purchase; we provide ongoing after-sales support and strive to foster a vibrant community of imagers who can share their experiences and learn from one another. Let us be your trusted guide on this incredible journey.
Conclusion: Your Journey to Capturing the Universe Awaits
Choosing the best telescope for astrophotography is a significant and deeply personal decision. It's a careful balance of considering the aperture for light gathering, focal length for framing your subjects, the optical design's inherent characteristics, the critical capability of your mount, and, most importantly, your specific imaging interests. Remember, astrophotography is a marathon, not a sprint. The learning curve is an integral part of the adventure, and the rewards – your very own breathtaking images of the cosmos – are truly unparalleled. Your chosen telescope for astrophotography is your dedicated eye on the universe, your mount, and its steady, unwavering hand. Invest wisely in both, empower yourself with knowledge, and the stars themselves are yours to capture.
FAQs: Clearing Up Your Astrophotography Telescope Queries
What single type of telescope is generally considered the best all-rounder for a beginner in astrophotography?
A smaller Apochromatic (APO) refractor, typically in the 60mm to 80mm aperture range, paired with a solid, reliable German Equatorial Mount (GEM), is often highly recommended for beginners. These refractors offer excellent image quality, are relatively lightweight and portable, require minimal maintenance (no collimation), and are more forgiving to learn with, especially for deep-sky objects. This combination makes it a strong contender for the best telescope for astrophotography for those just starting out.
Can I use my existing visual beginner telescope for serious astrophotography?
It depends heavily on the telescope and, more crucially, its mount. Many beginner telescopes are sold with Alt-Azimuth (Alt-Az) mounts, which are generally unsuitable for the longer deep-sky exposures required. The optics might also not be optimized for the demands of imaging (e.g., lacking a flat field or good color correction). You might be able to try some basic lunar or planetary imaging (which often uses short video captures), but for serious deep-sky work, you will likely need to upgrade your mount and possibly the telescope for astrophotography itself to one designed with imaging in mind.
How critical is a GoTo mount when selecting my first astrophotography telescope setup?
While not strictly essential – you can learn to manually find objects by "star-hopping" – a GoTo mount significantly speeds up the process of locating faint celestial objects that are often invisible to the naked eye or through a finder scope. This allows you to spend more of your valuable dark sky time actually imaging rather than searching. For beginners, a GoTo system can significantly reduce frustration and is highly recommended for any serious setup involving astrophotography telescopes.
For the best telescope for astrophotography setup, what's more important: the telescope tube or the mount?
Overwhelmingly, the mount is more important. A high-quality, stable, and accurate German Equatorial Mount is the absolute foundation of any successful astrophotography rig. You can capture decent images with a modest optical tube assembly (OTA) if it's on a great mount. But even the best telescope for astrophotography optically will produce poor, trailed images if it's on an inadequate or overloaded mount. Invest in the best mount you can afford first.
What's a realistic budget for a good entry-level dedicated astrophotography telescope and mount?
A good, solid entry-level setup, for example, featuring a small APO refractor (like a 72ED or 80ED) or a 6-inch imaging Newtonian, combined with a capable GoTo equatorial mount (such as an HEQ5-class or better), can range from approximately $1500 to $3000 USD and upwards. This typically does not include the camera, autoguiding system, or other essential accessories. Quality astrophotography telescopes and, especially, mounts are precision instruments and represent a significant but worthwhile investment.
I'm a complete beginner; what’s the absolute best telescope for astrophotography to ensure I don't get frustrated?
To minimize frustration as a complete beginner, prioritize ease of use and a very solid foundation. A quality small APO refractor (perhaps 60mm to 80mm) on a reliable GoTo equatorial mount (like an HEQ5 Pro or Celestron AVX) is often cited as a fantastic, relatively frustration-free starting point. These astrophotography telescopes are more forgiving with balance, don't require collimation, and provide sharp, well-corrected images, allowing you to focus on learning tracking, focusing, and basic image acquisition. This makes it arguably the best telescope for astrophotography for a smooth entry into the hobby.
Can I attach my DSLR or mirrorless camera to any telescope for astrophotography?
Most telescopes designed with imaging capabilities, or those that can achieve focus with a camera, can accept a DSLR or mirrorless camera. You will typically need two inexpensive adapters: a T-Ring that is specific to your camera's lens mount (e.g., Canon EOS, Nikon F, Sony E-mount) and a T-Adapter (often a 1.25" or 2" nosepiece) that threads into the T-Ring and inserts into the telescope's focuser. It's crucial to ensure the telescope for astrophotography you choose has sufficient "back focus" to allow your camera sensor to reach the focal plane.
Are bigger astrophotography telescopes always better for imaging everything?
Not necessarily. While a larger aperture gathers more light, which is beneficial for faint, deep-sky objects, it also usually means a longer focal length. This results in a narrower field of view (making it harder to frame large nebulae or require mosaics), greater magnification (making guiding more critical and demanding on the mount), more weight (requiring a more substantial and expensive mount), and generally higher cost. The "best" size for a telescope for astrophotography depends entirely on your primary targets, the capability of your mount, your imaging location (portability needs), and your budget. Sometimes, a smaller, faster, wider-field instrument is far more practical and effective.


No Comments